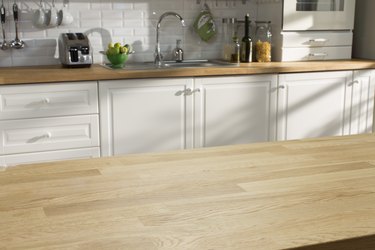
Epoxy resin tables are instantly recognizable by their high-gloss finish and the unique depth of their glass-like coating. An epoxy resin table is durable and long-lasting, making it a fun and popular choice for homes projects and restaurants. The notable feature of epoxy resin tables is the ability to seal objects and memorabilia within the epoxy resin, enabling you to create a unique table that showcases your interests and hobbies. You can personalize an epoxy resin table with seashells, pictures, jewelry pieces, stamps and even fabric.
How to Make an Epoxy Resin Top Table
Video of the Day
Step 1: Clean the Surface Area
Select a table or space with sturdy legs. The built-up epoxy resin will be heavy and requires substantial support. Clean the table of any dirt, dust or stains. Debris will be trapped with the epoxy if not cleaned thoroughly beforehand.
Video of the Day
Step 2: Prepare Space to Work
Apply masking tape on the underside of the table, along the edge, to protect the bottom of the table from drips. Place newspapers under the table to catch drips.
Step 3: Decorate and Make your Design
Use a hot glue gun to secure your decorative items to the tabletop. Make sure the items are arranged and clean before you glue them down. Once the items are glued and sealed, they cannot be moved, so choose your placement with care.
Step 4: Seal with Glue
Seal the table and decorative items with a mixture of four parts white all-purpose glue to one part water. Paint the mixture onto the tabletop and allow at least four hours drying time. The sealant coat must be completely dry, with no wet spots, before proceeding to the epoxy resin coat.
Step 5: Safely Prepare Epoxy Resin
Open the windows to provide ventilation. Put on protective gloves before working with the epoxy resin.
Mix the epoxy resin according to the manufacturer's directions. The amount will vary, depending on the size of the tabletop and the amount and type of objects you are embedding in the resin. Use the coverage guidelines provided by the epoxy resin product to determine the quantity to mix.
Step 6: Evenly Spread Epoxy Resin on Surface
Pour the mixed epoxy resin evenly over the tabletop. Most epoxy resins will pour to a thickness of 1/16 inch to 1/8 inch. Use the mixing stick to move the epoxy resin over the surface of the table until the tabletop has an even coat. Smooth the epoxy resin along the edges of the table with the mixing stick.
Step 7: Remove Air Bubbles
Watch for any air bubbles that may develop in the next 30 minutes. Remove the air bubbles by gently blowing on them through a straw or holding a propane torch at least 6 inches from the surface and moving it quickly over the surface. Use a toothpick to pop any bubbles that remain.
Step 8: Scrape Off Excess Resin
Wait until the epoxy resin begins to thicken before scraping away the excess. Use tongue depressors or a plastic spoon to scrape off excess epoxy resin from the bottom edge of the table. You can use acetone to remove wet epoxy resin if there are any mistakes or spills.
Step 9: Create a Protective Tent
Protect the tabletop from settling dust. Suspend a tarp, sheet or large cloth over the tabletop using tall chairs positioned around the table to anchor the tarp and hold it off the surface of the table.
Step 10: Follow Drying Times
Allow the epoxy resin to cure for the time recommended by the product. Apply additional coats of epoxy resin, following the application process, until you achieve the desired thickness.
Step 11: Remove Tape and Sand When Dry
Remove the masking tape from the underside of the table after the final coat of epoxy resin has cured. Remove any remaining drips with sandpaper.