
How to Make a Bourbon Barrel Cabinet

When a distillery makes bourbon, it uses new, heat-treated oak barrels. Bourbon ages in these barrels for a minimum of two years. After the barrel is empty, the distillery may use it to create whiskey or sell it to either whiskey distilleries or the public.
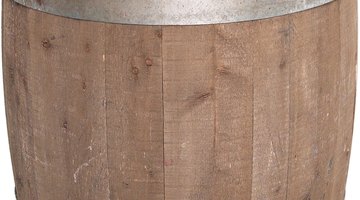
If you create a cabinet from a bourbon barrel that was recently emptied, the room in which you place the barrel may smell of bourbon for several months. If you do not want this smell in your home, purchase a new oak barrel, like the kind that bourbon distillers use, so you only smell the wood.
Things You Will Need
- Oak bourbon barrel
- Hammer
- Scrap piece of lumber
- Circular sander
- Sandpaper
- Sanding block
- Safety goggles
- Dust mask
- Cellophane adhesive tape
- Plastic wrap
- Water
- Dish soap
- Dry towel
- Latex gloves
- Epoxy glue that is safe for metal and wood
- Wood glue
- Vacuum
- Tape measure
- Piece of cardboard
- Pencil
- Ruler
- Sheet of plywood, ½-inch thick
- Jigsaw
- 5 small mounting brackets
- Drill
- Screws that fit into the holes of the mounting brackets
- Nuts that fit onto the screws
- Two cabinet hinges
- Small doorknob
Tip
If you are not able to apply the glue in a well-ventilated area, use a gas mask to avoid inhaling harsh fumes.
-
Remove the metal bands that are around the outside of the barrel. If they do not slide off easily, use a hammer and a scrap piece of lumber to tap them off the barrel.
-
Sand the exterior of the barrel with an electric circular sander. Use coarse sand paper first, followed by a medium-grain sand paper. To create a smooth finish, sand the barrel with a fine-grit sand paper. To avoid scratching the metal rims on the top and bottom of the barrel, use a sanding block near their edges. Wear safety goggles and a dust mask as you dust to avoid inhaling sawdust or getting it in your eyes.
-
Fit the metal bands back onto the barrel. Place the metal bands you previously removed onto the oak barrel and tap it into place with the hammer and scrap piece of lumber.
-
Place cellophane adhesive tape around the barrel, directly above and below the metal bands, as if to outline them. Place the tape as close as you can to the bands without taping the band to the barrel.
-
Remove the metal bands from the oak barrel.
-
Tape a layer of plastic wrap around the barrel, above and below the location where the bands sat. Leave the outline of the bands you created with the tape bare.
-
Wash the metal bands with dish soap and water to remove excess oils and dirt. Wear latex gloves as you dry the bands with a dry towel.
-
Apply epoxy glue to the bare ring on the barrel where you place the band and to the inside of the band. Wear gloves as you do this so you do not accidentally get glue on your bare skin. Slide the band back onto the barrel so it sits on the area where you applied the glue. Allow the glue to dry according to the manufacturer’s instructions.
-
Remove the plastic wrap and tape once the glue is dry. Use sandpaper to get rid of excess glue that may be on the barrel.
-
Cut out the cabinet doors from the barrel. The height of the door will equal the space between the two bands on the barrel. The width will equal six parallel oak strips. Place the cellophane tape across six oak strips on the barrel so it covers the wood from band to band. The tape will help keep the strips of wood together. Use a circular saw to cut across the oak strips along the lower rim of the top band and the top rim of the band on the bottom.
-
Glue the strips of oak you previously cut from the barrel with wood glue so you can create a solid cabinet door. Leave the tape over the strips of wood as the glue dries. Remove excess dried glue with sandpaper.
-
Clean the inside of the bourbon barrel if it is not brand new. Use sandpaper, so the wood has an even finish and vacuum out the dust.
-
Make a shelf template. Measure the diameter of the inside of the barrel and draw a circle of the same size onto a piece of cardboard. Place the cut piece of cardboard inside the bourbon barrel and use a pencil to make a mark where the cabinet doorway begins and ends. Remove the cardboard circle, draw a straight line between the marks you made and cut along the line. Place the piece of cardboard back into the barrel to make sure it fits well and that you can close the cabinet door properly.
-
Make the bourbon cabinet shelf. Trace the cardboard cutting onto a piece of ½-inch thick sheet of plywood. Cut out the shape with a jigsaw and sand the edges smooth.
-
Attach five mounting brackets to the plywood shelf you made. One will go on the back curved edge, two will go on either side of the front edge and the remaining two will go on opposite sides of the shelf, between the middle bracket and the ones closest to the front edge. Use screws to secure the brackets into place on the shelf.
-
Secure the shelf into the bourbon barrel cabinet. Place the shelf into the barrel, at the level you desire. Use a level to make sure the shelf is in straight. Use a pencil to color in the bracket holes that attach to the barrel. Remove the shelf and use a drill to make a hole in the locations you marked with the pencil. Place the shelf back into the barrel, and place screws through the holes from the outside of the barrel and through the brackets. Use nuts on the inside of the barrel to help hold the screws in place.
-
Install the cabinet door. Place two cabinet door hinges along the left edge of the door, so they are one-half inch from the top and bottom; screw the right side of the hinges into place. Line the door up with the opening you cut in the barrel and screw the left side of the hinges into the exposed oak strip of the barrel.
-
Install a small doorknob or handle onto the right side of the cabinet door.
The Drip Cap
- When a distillery makes bourbon, it uses new, heat-treated oak barrels.
- Bourbon ages in these barrels for a minimum of two years.
- Slide the band back onto the barrel so it sits on the area where you applied the glue.
- Remove the plastic wrap and tape once the glue is dry.
- Use sandpaper to get rid of excess glue that may be on the barrel.
- The width will equal six parallel oak strips.
- Remove excess dried glue with sandpaper.
- Clean the inside of the bourbon barrel if it is not brand new.
- Secure the shelf into the bourbon barrel cabinet.
- Use a pencil to color in the bracket holes that attach to the barrel.
- Remove the shelf and use a drill to make a hole in the locations you marked with the pencil.
- Place the shelf back into the barrel, and place screws through the holes from the outside of the barrel and through the brackets.
Writer Bio
Flora Richards-Gustafson has been writing professionally since 2003. She creates copy for websites, marketing materials and printed publications. Richards-Gustafson specializes in SEO and writing about small-business strategies, health and beauty, interior design, emergency preparedness and education. Richards-Gustafson received a Bachelor of Arts from George Fox University in 2003 and was recognized by Cambridge's "Who's Who" in 2009 as a leading woman entrepreneur.
Photo Credits
- Hemera Technologies/Photos.com/Getty Images
- Hemera Technologies/Photos.com/Getty Images
More Articles