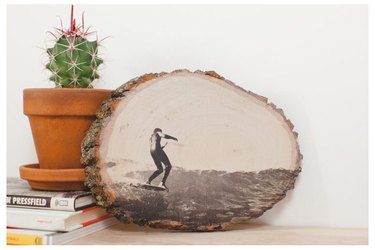
If simply framing your favorite photos doesn't quite do them justice, try transferring your best prints onto wood. This creative display will showcase your picture perfect moments in a manner that's worthy of their greatness.
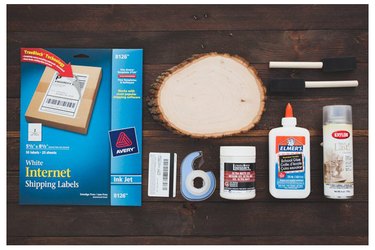
Things You'll Need
Video of the Day
- Wood
- Inkjet printer
- Shipping labels
- Matte finish sealer spray
- Matte gel medium
- Clear drying glue
- Foam brushes, ( 2 )
- Credit card or gift card (to act as a squeegee)
Video of the Day
Step 1
Gather your materials so you have everything you need on-hand before you begin.
Step 2
Remove and discard the labels from the backing of the shipping labels. You'll use the backing in order to transfer the ink from your chosen image to your piece of wood.

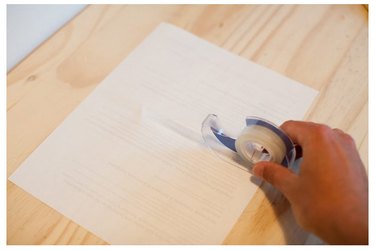
Step 3
Tape any perforated seams on the back of the paper so they do not accidentally break during the printing or application processes.
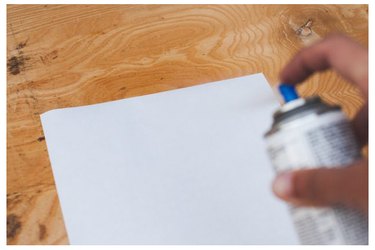
Step 4
Spray the backing with a thin, even coat of spray-on clear sealer in a well-ventilated area and let dry completely.
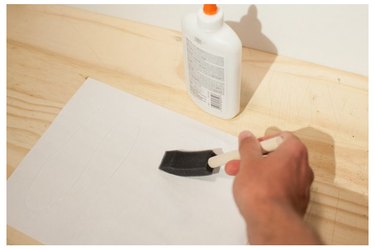
Step 5
With a foam brush, apply a thin layer of glue evenly over the backing and let dry.
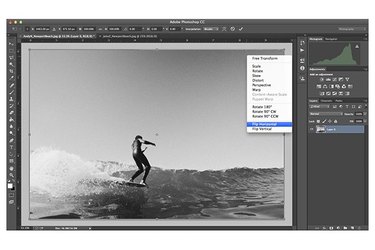
Step 6
Select the image you would like to print. If your image has text, be sure to flip it using the photo editing software of your choice, otherwise it will come out backwards when applied to the wood. Print your image onto the paper, on the side with the dried glue, and be careful not to smudge the image once it's printed.
Step 7
Prepare your wood surface for the transfer. Be sure to sand the surface and wipe clean, if necessary.
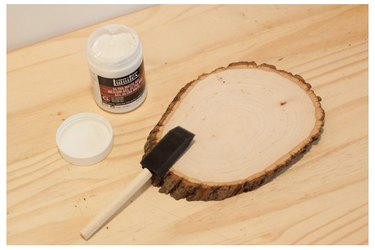
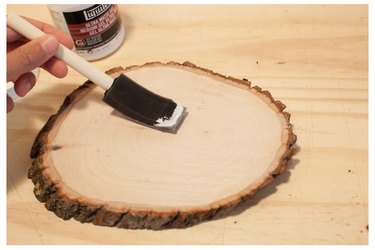
Step 8
Apply the matte gel to the wood with a foam brush, making sure to throughly coat the surface.
Step 9
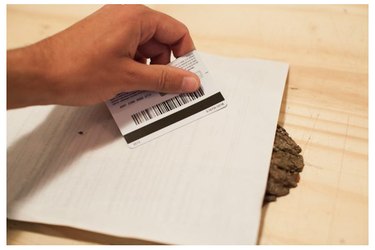
While the gel is still wet, apply your image face down on to the wood. Starting from the center and working towards the edges, push out any air bubbles using the gift card as a squeegee. Let dry for an hour and a half.
Step 10
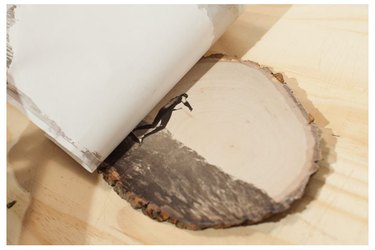
Slowly peel the paper from wood, revealing the transferred image, and finish with a coat of clear sealer.
Step 11
Proudly display your wood print on your desk, mantle or anyplace that will allow you to show off your favorite photo (not to mention your DIY prowess).
