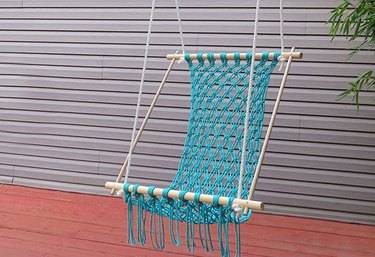
Sometimes, relaxing on the porch requires a comfortable and stylish hammock. With a few tools and some basic math skills, you'll have a beautiful chair that shows off your do-it-yourself skills. This hammock is made using the macrame technique, which requires knotting together cords. Macrame is a centuries-old method used to make furniture, plant holders and other home decor items.
Things You'll Need
Video of the Day
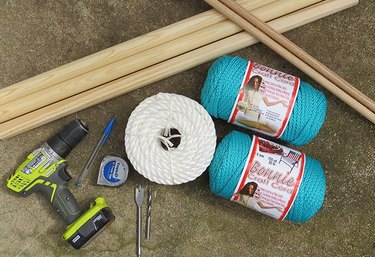
- 3 1 1/4-inch hardwood dowels, 30-inches long
- 2 5/8-inch hardwood dowels, 36-inches long
- 200 yards, 1/4-inch macrame cord or rope
- 8 yards, 1/2-inch rope
- 4 1-inch wood screws
- Drill and 5/8-inch bit
- Measuring tape
- Scissors
Video of the Day
Measure the Dowels
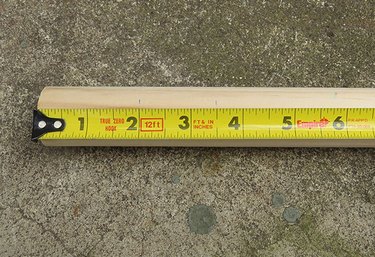
While measuring and drilling the dowels, ensure all the holes are level and lined up with each other so that the frame is perfectly square. On two of the 1 1/4-inch dowels, measure and mark at 2 inches and 3 1/2 inches from each end. The third 1 1/4-inch dowel will only need to be marked at 3 1/2 inches from each end.
Drill Holes in the Dowels

Drill a hole at each mark on each 1 1/4-inch dowel. Start with a small drill bit and work your way up to 5/8 inch. A spade bit or dowel jig makes this much easier.
Sand the Holes
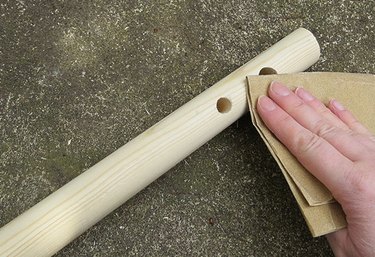
Sand the holes to remove any splinters from drilling.
Slide the Dowels Together
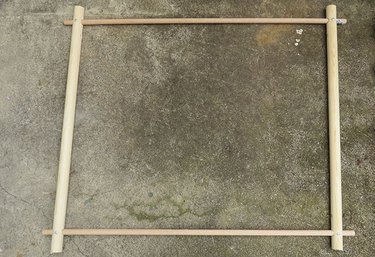
Make a square frame for the seat by sliding each of the small dowels into the 5/8-inch holes on the large dowels. Leave about 1-inch overlap on each end.
Secure the Frame With Screws
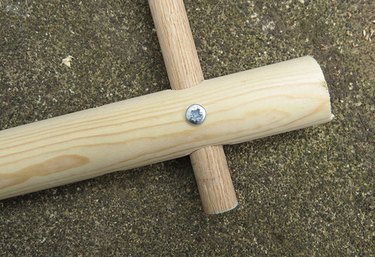
Drill a small pilot hole where the dowels meet. Using a 1-inch screw, secure the two pieces together.
Hang the Frame
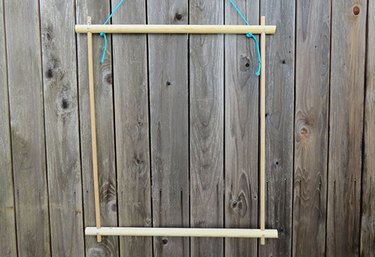
Before starting the macrame, temporarily hang the frame in a place where you can easily stand or sit to knot the ropes.
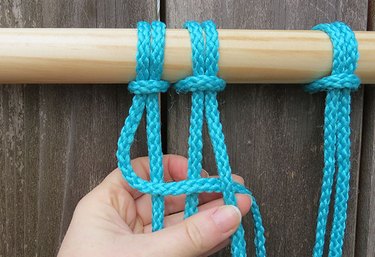
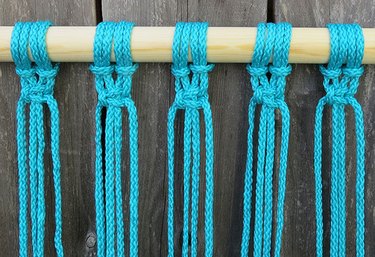
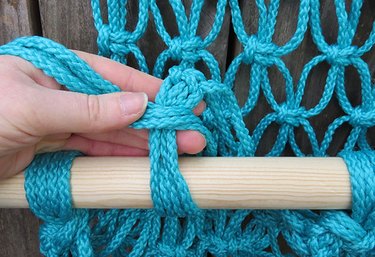
Wrap the Cords Around the Dowel

Using the 1/4-inch cord, cut 16 26-foot pieces. It sounds like a lot but as you knot, the cord shortens quickly. Pick up one cord and fold it in half. Wrap the loop around the dowel from the front to back. Pull the tails through the loop. Continue with all 16 strands of cord. Once they're all hanging, you'll have 32 strands.
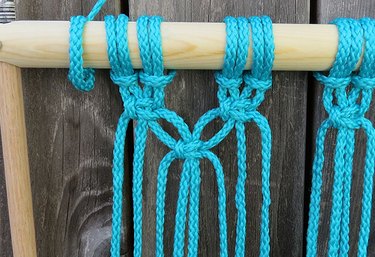
Cross the Cords From Left to Right
To create the seat, you'll be using a simple square knot. Starting with the first four cords, take the left cord and cross it over the center two, then under the right cord.
Cross the Cords From Right to Left

Take the right cord and cross it under the center two cords and up through the hole, passing over the left cord.
Complete the Square Knot
To complete the second half of the knot, you'll do the same thing in reverse. Take the right cord and cross it over the center two, then under the left cord. Then take the left cord and cross it under the center two cords and up through the hole, passing over the right cord. Pull the knot tight. Continue this with all the cords.
Start With the Third Cord
The next row also uses the same square knot but starts with the third cord. You'll be using two strands from each section. When knotting them together, make sure to keep everything even. Continue this until to reach the end of your cords.
Repeat the Pattern
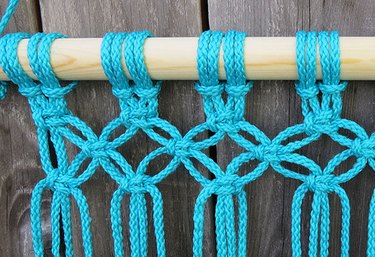
Now the pattern repeats. Just like in the beginning, tie a square knot with the first four cords and work your way across. Then use the third cord to start the next row.
Knot Until the Seat Measures 45-inches Long
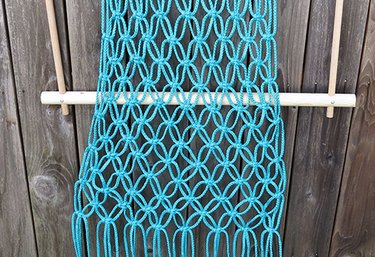
Continue knotting until the seat is about 45-inches long. The finished macrame needs to be longer than the frame.
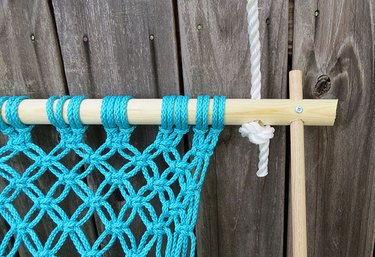
Attach the Seat to the Frame
To attach the ends to the bottom of the frame, wrap all four cords from each section around the dowel and tie a knot.
Tie a Second Knot

Tie a second knot by splitting the strand into two. Pull it as tight as you can.
Cut the Ends of the Cords

Cut the ends of the cords to the length desired. You can fray the ends or leave them as is.
Cut a 1/2-inch Rope
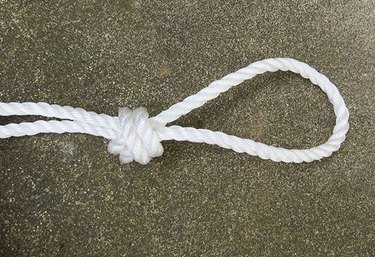
Cut one 120-inch piece of 1/2-inch rope. Fold it in half and tie a knot a few inches from the top, creating a loop.
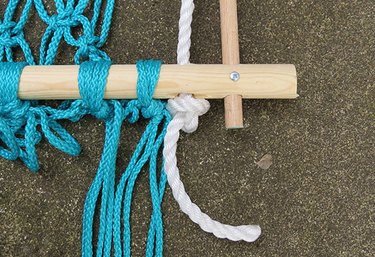
String the Rope Through the Dowel
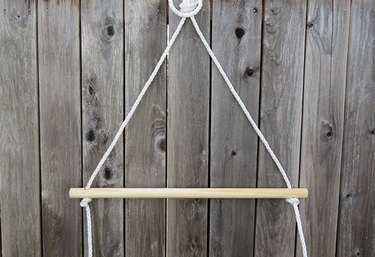
At this point, if you can hang the rope in a temporary place by the loop, it will be much easier to make sure all the ropes are even moving forward. Using the leftover third dowel, string the rope through each hole and tie a knot, leaving about 20 inches in between the loop and dowel.
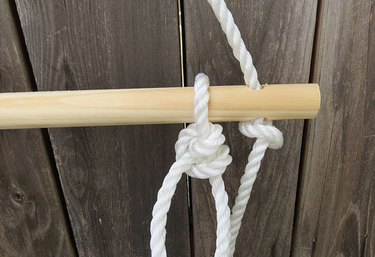
String the Rope Through the Top of the Frame
Continue with the same piece of rope. String it down through the top of the frame on each side and tie a loose knot, leaving 30 inches in between the two dowels. You want a loose knot because once you hang the finished chair, you'll need to make some minor adjustments.
String the Rope Through the Bottom of the Frame
Cut two 65-inches pieces of 1/2-inch-thick rope. Starting at the bottom of the frame, string one rope on each side through the hole and tie a loose knot. This time, the knot should be below the dowel with the rope running up.
Tie the Rope Around the Third Dowel
Run the rope all the way up to the top third dowel. Wrap the rope around the dowel and tie a loose knot, leaving 60 inches between the third dowel and the bottom of the frame.
Hang the Seat and Adjust the Ropes

Now you can hang the chair in a more permanent spot using a sturdy hook on your porch or deck. Make sure all the ropes are even. If you need to make any adjustments, this would be the time to do so. Then, tighten all of your knots. Use caution when sitting in the hammock for the first time. The ropes will expand a little and form to your weight. Once everything feels right, cut off any excess rope hanging below the knots or fray them to hang free.