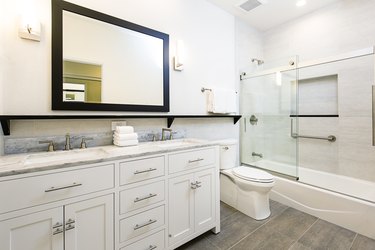
If you're tired of your old tiled shower enclosure and are up for an intermediate-level DIY project, installing a shower surround over the tiles is a great option for a cosmetic bathroom remodel. Shower and tub surround kits are available in a range of styles and materials. Most simply glue to the wall, and many include corner and edge pieces the help to seal out water and give the surround panels a finished look.
Here's how to install a shower surround (or tub surround) over wall tile that's in good shape.
Video of the Day
Video of the Day
Choosing the Right Shower Surround
A shower surround, also called a shower kit or tub surround, is a modular panel system that is installed over drywall, cement board or other backerboard, or, in some cases, over existing tile. There are also systems designed for direct-to-stud installation. Surround wall panels can be made of acrylic, PVC, solid surface, fiberglass, and wood composite materials. The panels extend from the shower pan or shower base (or from the rim of a bathtub), overlapping one another and the flange at the top of the shower base or tub to create a watertight joint.
When choosing a shower surround system or kit, make sure it is suitable for installation over tile.
How to Install a Shower Surround Over Existing Tiles
1. Remove the Plumbing Fixtures
Remove the faucet handle, face plate, spout, and showerhead, as applicable. Typically, standard screws or setscrews secure each of these items in place. Back out the screws with a screwdriver or Allen wrench and remove the items from the shower wall. Lay a drop cloth in the tub to protect its surface while you work.
2. Rough Up the Tile Surface
Scratch the tile with sandpaper to roughen the surface. This gives the panel sealant a stronger hold. As you sand the tiles, you may notice some loose ones. Remove any loose tiles with a pry bar. Scrape off dried adhesive from the back of the tiles, then glue them back in place with construction adhesive or tile adhesive. Secure each tile with painter's tape or masking tape until the adhesive cures.
3. Cut and Install the Apron-Trim Pieces
Measure the height of the shower base (or tub), from the baseboard molding's top edge to the base's top edge. Transfer this measurement to the supplied apron-trim piece, and cut this piece to length with a hacksaw. Measure the base's width, transfer this measurement to another supplied apron-trim piece, and cut it with the hacksaw. Peel off the paper backing from each trim piece; stick one to the wall next to the shower base and the other over the base on the tile.
4. Level the Vertical Apron-Trim Piece
Hold a 4-foot level over the vertical apron-trim piece next to the base. Adjust the level so it is plumb. Draw a pencil line on the wall, using the level as a straightedge.
5. Dry Fit the Back Panel
Install the shower surround's back panel first. Lift it up to the wall, line up its outer edge with the pencil line you made in Step 4, and position it so it is plumb. If necessary, shave off some of the panel's bottom edge off with sandpaper or a sander so it fits plumb on the wall and there are no large gaps between the panel's bottom edge and the base's top edge.
6. Apply Sealant and Position the Panel
Flip the panel over. Insert the supplied sealant tube into a caulk gun. Apply a bead of sealant onto the panel, keeping it about 1 inch in from the foam tape around the perimeter. Peel the paper backing off of the foam tape on the back of the panel and position the panel over the tile. Rub your hand across the panel, up and down, to press it firmly against the tile.
7. Position the Side Panel
Test-fit the shower's side panel and sand away part of the bottom edge if necessary. Measure the length of the wall and divide by two. Place a mark on the tiles at this location. Measure the length of the panel and divide by two. Place a mark on the panel at this location. Repeat Step 6 and fit the panel in place on the tiles, lining up the two center marks.
8. Make a Cardboard Template
Cut a piece of cardboard to the same size as the front panel — this is where all of the fixtures will originate. Measure the placement of each fixture on the wall and transfer these measurements to the cardboard. Use a utility knife to cut out each hole. Hold the cardboard template up to the tile shower wall to confirm that your measurements match up.
9. Trace the Template Cutouts onto the Panel
Set the cardboard template onto the front panel. Trace the circular cutouts onto the panel. Cut out the tracings with a drill and a hole saw. For large cutouts, you can make the cutouts with a jigsaw.
10. Apply Sealant to the Panel
Apply beads of the supplied sealant to the back of the panel and around each cutout. Press the panel onto the tiles.
11. Reinstall the Fixtures and Seal the Joints
Reinstall the face plate, faucet, spout, and showerhead. Run a bead of silicone caulk along the corner and bottom seams where the panels meet each other and where the panels meet the shower base's top edge. Smooth the caulk with a damp finger. Let the caulk cure, as directed, before using the shower.