
How do I Clean a Pressure-Reducing Water Regulator Valve?

National and local plumbing codes require that a water pressure reducing valve should be installed at buildings where municipal water supply pressures exceed 80 psi. The pressure reducing valve contains a screen that must routinely be cleaned of debris to ensure proper functioning.
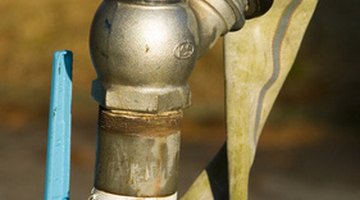
This screen protects the household plumbing from becoming clogged with debris that can often cause "splurting" water from the faucets. Learning to correctly clean it can prevent water trouble in your home.
Things You Will Need
- Bucket
- Warm water
- Mild detergent
- Rag
-
Turn the main waterline leading to the pressure reducing valve. This valve is usually located where the waterline enters the home.
-
Unscrew the strainer plug on the pressure-reducing valve. This is a large cap screw on the upstream side of the pressure valve. Hold a bucket by the valve to catch the water in the household pipes, which drains back after unscrewing the strainer plug.
-
Remove and clean the stainless steel strainer screen by using warm water, mild detergent and a rag. Gently rub the strainer screen clean of any debris.
-
Reinstall the strainer screen and strainer plug in the same way that you removed them.
-
Carefully turn the water back on at the main water valve, and examine the water system for leaks.
Warning
Leaving the water on while cleaning the water reducing valve may cause flooding.
Ensure no one is using water during this cleaning procedure.
The Drip Cap
- National and local plumbing codes require that a water pressure reducing valve should be installed at buildings where municipal water supply pressures exceed 80 psi.
- This valve is usually located where the waterline enters the home.
- Hold a bucket by the valve to catch the water in the household pipes, which drains back after unscrewing the strainer plug.
References
Writer Bio
Stephanie Cates began writing professionally in 2010. She has vast knowledge of cross-cultural studies, individual and team sports and international development. She holds a Bachelor of Arts in clinical psychology from Point Loma Nazarene University in San Diego and is pursuing a Bachelor of Arts in education and community development from the Institute of Global Outreach Developments International in Nashville.
Photo Credits
- water hose with valves image by Craig Hanson from Fotolia.com
- water hose with valves image by Craig Hanson from Fotolia.com
More Articles