By design, an automatic pilot light does not need to be lighted or relighted; it turns on and off by itself. Only a pilot light with a continuously burning flame — called a standing pilot— requires manual relighting if the pilot flame goes out.
On very old gas furnaces and other appliances, relighting a standing pilot is done with a barbecue-wand-style lighter (preferably) or a long match. But there are newer versions of standing pilots that include a spark mechanism for relighting a pilot that goes out. In addition, there are a few different types of automatic pilots, which are sometimes called igniters. If an automatic pilot or igniter is failing to light the burners on your appliance, it typically needs to be replaced.
Video of the Day
Video of the Day
Identifying Your Pilot Light
The job of the pilot or igniter is to ignite the gas flowing from the main gas valve to the appliance burners. All pilots have a safety system that prevents the main gas valve from staying open if the pilot flame has gone out or the igniter has failed. This effectively shuts down the system, so you will get no heat from the appliance if the pilot is not working properly. Determining which type of pilot or igniter you have is the first step to solving your problem.
- Standing pilot: This is found on old furnaces and stoves and on many gas water heaters. A small flame, about the size of a candle flame, burns continuously at the end of a small gas pilot tube. The flame burns directly into a thermocouple, a safety device that allows the main gas valve to open only when the pilot is burning. Standing pilots can be relighted with a match or lighter or with a built-in spark igniter that you activate with a button.
- Intermittent pilot: This works like a standard pilot, but instead of having a continuously burning flame, the pilot is lighted automatically (by a spark or a small hot-surface igniter) only when there is a call for heat. After the heating cycle, the pilot flame automatically goes out.
- Direct spark: This automatic ignition system does not include a pilot light. It uses a spark to light the gas directly at the burners.
- Hot-surface igniter: This type of automatic ignition has no pilot flame and features an electric probe that heats up like a light bulb filament. When the probe is red-hot, the main gas valve opens and the gas is ignited at the burners.
Things You'll Need
Barbecue lighter or long match
Relighting a Standing Pilot Light
Most standing pilots are lighted in a similar way, but specific steps can vary among different models and appliances. Always follow the procedure provided by the appliance manufacturer. Relighting instructions are typically displayed on the appliance itself, often near the gas control knob on the inside of the access cover or on the outside of the appliance body. These steps outline the standard procedure for relighting a standing pilot light on a gas furnace.
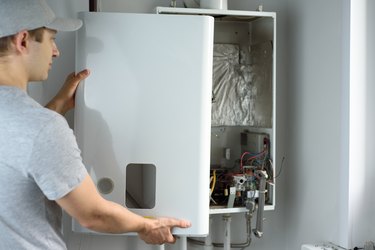
Step 1: Remove the Access Cover
Remove the access cover on the burner compartment of your furnace. Some panels simply lift off; others may be held by screws.
Step 2: Identify the Pilot Parts
Locate the gas control knob inside the burner compartment. This is usually a white or red plastic knob that is on top of the main gas valve. Using a flashlight if necessary, note the small pilot gas tube leading from the main gas valve and extending into the burner area; at the open end of this tube (inside the burner area) is where you will light the pilot. The metal probe next to the end of the pilot tube is the thermocouple; the thermocouple probe is at the end of a stiff wire that leads back to the main gas valve. Look for a small igniter button near the gas control knob, which may be labeled with words or just a symbol, such as a lightning bolt; if there is no igniter button, you will light the pilot with a lighter or match.
Step 3: Turn Off the Gas and Wait
Turn the gas control knob to the "off" position. Wait for at least five minutes to allow all residual gas to clear from the appliance and allow the thermocouple to cool. If you smell gas after the gas valve is in the off position, you may want to shut off the gas to the appliance and have a professional look at it.
Step 4: Get Ready To Light
Turn the gas control knob to the "pilot" position; this will not release any gas. If your furnace has no spark igniter, strike a match or ignite the flame with a barbecue lighter, holding the flame away from all appliance parts.
Step 5: Light the Pilot
Press the gas control knob down all the way and hold it in the depressed position. If you have no igniter, move the match or barbecue lighter flame to the end of the pilot tube; the pilot flame should light immediately. If you have a spark igniter, press the ignition button until the pilot flame ignites. Continue holding down the control knob for 30 seconds and then release the knob; it should pop back up to its original position. If the pilot flame goes out, repeat the lighting process from the beginning, starting with turning off the gas and letting the appliance air out.
Step 6: Turn On the Gas
Confirm that the pilot flame is burning. Turn the gas control knob to the "on" position. Reinstall the access cover; then turn up the thermostat to call for heat and make sure the furnace starts normally. If you cannot get the pilot flame to stay on or if the furnace does not start up normally after you turn up the thermostat, turn the thermostat way down so it will not turn on (or simply turn it off if it has an on/off switch); then call a professional.