Swapping out an existing circuit breaker for a new matching breaker in the main circuit breaker box is a very simple job, but it's best left to a professional. Circuit breakers connect only to the hot wires of circuits. Unlike when installing a new circuit, when replacing a circuit breaker the neutral and ground wires are already connected to the neutral/ground bus bars, so the hot wires are the only connections that need to be changed. These connections differ by the type of circuit: Single-pole circuits have one hot wire; double-pole circuits have two hot wires. One of the most important rules of replacing a circuit breaker is using the right type of breaker for the circuit and the main service panel (breaker box).
Video of the Day
Should You Replace Your Own Circuit Breaker?
Replacing a circuit breaker is a job for a licensed electrician. It is not a difficult project, but there are a number of things that can go seriously wrong—things like electrocution and creating situations where your home is unprotected from fire hazards. Because circuit breakers protect your wiring (and your house) from circuit overloads, improperly installed breakers can be very dangerous. Also, any work inside the service panel with the breaker box cover (called the dead front cover) removed exposes the worker to deadly current from the utility service connections.
Video of the Day
Using the Right Breaker
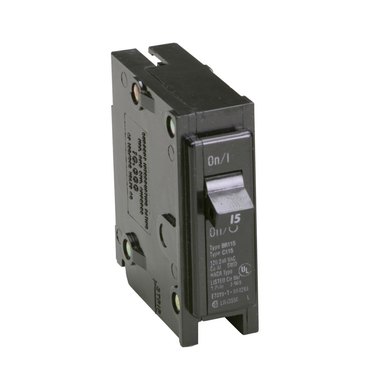
All circuit breakers do the same thing, but they are not interchangeable. There are many different manufacturers of service panels and breakers, and breakers are designed specifically for use in certain panels. In addition to brand and model compatibility, breakers must be the right type and have the same amperage and voltage ratings as the circuit wiring they are protecting. A circuit designed for 15-amp service must have a 15-amp breaker. Installing a 20-amp breaker on a 15-amp circuit creates a serious fire hazard.
The safest approach to choosing a replacement breaker is to use the exact same breaker as the original—the same brand, breaker model and voltage and amperage ratings. While some breakers are advertised as being compatible with other manufacturers' panels, it's best to use the same manufacturer and the same model or line of circuit breaker. It's also important to note that not all breakers from a given manufacturer are compatible with all of the panels from that same manufacturer. When in doubt, it's best to consult the manufacturer directly.
The one change that is sometimes made with a replacement breaker is to swap a standard breaker with a GFCI (ground-fault circuit-interrupter) or an AFCI (arc-fault circuit-interrupter) breaker to provide additional safety protection to an entire circuit.
Warning
The utility service wires that enter the service panel and connect to the service lugs (terminals) inside the panel are always hot, meaning they carry deadly live voltage and current. Turning off the panel’s main breaker shuts off all of the branch circuits, but it does not shut off the service lines or their connecting lugs. Only the utility company can shut off the power in a home’s service lines.
How to Replace a Circuit Breaker
This is the basic process electricians follow to replace a 120-volt or 240-volt circuit breaker in a household electrical system. For safety, the worker first shuts off the main circuit breaker and tests for voltage before touching any wires or wire connections. As a general precaution, electricians always use insulated tools when working inside a panel.
Step 1: Turn Off the Main Breaker
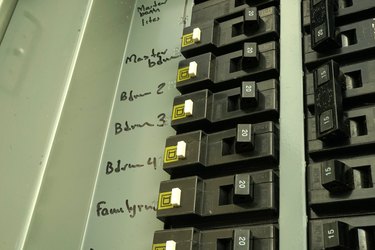
Open the service panel door and turn off the main circuit breaker to cut power to all of the branch circuits. Remember, though, that this does not turn off the power to the utility service lugs inside the panel.
Step 2: Remove the Panel Cover
Loosen the screws securing the dead front cover to the panel box. Lift the cover away from the box to expose the breakers and the panel wiring. Do not touch anything inside the panel.
Step 3: Test for Power
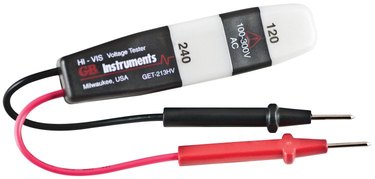
Test for voltage at one of the double-pole breakers: Make sure the breaker is switched on. Touch one probe of a neon circuit tester, voltage tester or multimeter to the neutral bus bar, and touch the other probe to each of the hot terminals on the double-pole breaker, one at a time. The tester should indicate zero voltage on both hot terminals, confirming the power is off to both hot bus bars of the panel.
Step 4: Remove the Old Breaker
Grip the inside and outside edges of the breaker to be replaced, and rotate the breaker toward the outside of the panel to release it from the tab on the bus bar. Slip the outside edge of the breaker out of the retaining clip on the panel to remove the breaker from its slot. Note: The breaker configuration and fastening mechanisms may vary.
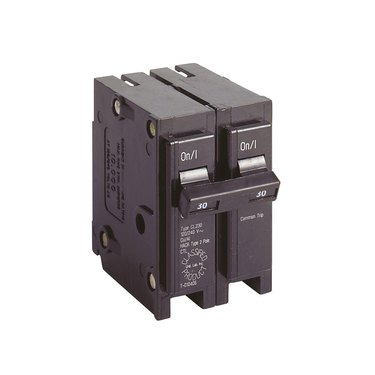
Loosen the screw terminal(s) on the breaker and pull the hot circuit wire from each terminal. Single-pole breakers have one hot wire (usually colored black). Double-pole breakers have two hot wires (one black and one red or white). Carefully position the wires so they the bare ends do not touch anything in the breaker box.
Step 5: Install the New Breaker
Inspect the end of each hot wire to make sure it is clean, bare copper without damage or scorch marks. If necessary, trim off any damaged portion and restrip the insulation to about 1/2 inch (or as directed by the breaker manufacturer).
Insert each hot wire into a hot terminal on the new breaker and tighten the terminal screw securely. The wire insulation should come very close to the terminal but should not be under terminal.
For a double-pole breaker, connect the second hot wire to the other breaker terminal; the two terminals are interchangeable, but it's best to use the same configuration as on the original breaker.
Fit the outside edge of the breaker into the retaining clip on the panel, then rotate the inside edge of the breaker down and press it down onto the hot bus tab until the breaker snaps into place. The new breaker should be flush with the neighboring breakers. Make sure the breaker's hot wire (or wires) is tucked neatly around the edge of the breaker box.
Step 6: Complete the Job
Reinstall the panel cover, securing it with its screws. Turn off all of the branch circuit breakers, then turn on the main breaker to restore power to the panel. Turn on the branch breakers, one at a time, to restore power to each individual circuit. Close the panel door.