
How to Repair Small Cracks on Stained Concrete Floors

Stained concrete adds a certain rustic elegance to a room. A stained concrete floor also adds warmth to an environment, and cleaning is easy with just a broom or a lightweight vacuum.
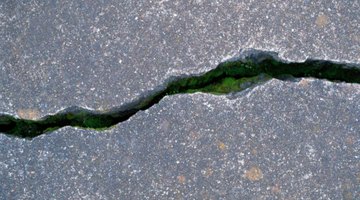
When the foundation of your home or building settles – and most foundations do – hairline fractures and cracks can appear in the concrete, marring an otherwise smooth finish and allowing dampness to creep into a room. It is possible to repair small cracks yourself when you have the right tools.
Things You Will Need
- Blow dryer
- Wire brush
- Vacuum with attachments
- Epoxy crack sealer or cement paste
- Medicine syringes or small plastic squeeze bottle with pointed tip
- Putty knife or straight edge
- Paper towels
- Concrete stain
- Paint pan
- Clean paint roller
- Electric box or oscillating fan
Repair
-
Make sure the concrete around and inside the crack is dry. If it rained recently and the crack is relatively deep, the crack may be damp, so you will need to dry it with a blow dryer on a warm setting.
-
Wait 15 minutes. If the crack remains dry, you may go ahead with the repairs. If the crack becomes damp again, you’ll need to wait for the weather to improve and for the crack to dry on its own.
-
Scrub the crack with a wire brush to loosen any crumbling or loose concrete.
-
Assemble the angled attachment to the vacuum hose and clean the concrete of all dust and debris.
-
Pull the plunger out of the syringe and fill the syringe with epoxy sealant. Replace the plunger and and place the syringe tip against the starting point of the crack.
-
Depress the plunger slowly, inserting sealant into the crack. Stop when you have traveled about 6 inches along the crack.
-
Scrape the putty knife along the crack where you’ve distributed the epoxy and smooth the finish, inserting more epoxy into the crack, if necessary, and wiping the excess on a paper towel. Make sure that the crack is filled with epoxy and the floor is level where the epoxy was injected into the crack. Continue inserting epoxy into the crack in 6-inch increments, smoothing and refilling as you go.
-
Train a fan set on low to blow directly on the patch to aid in drying. Clean your tools.
-
Allow the patched crack to dry for five days before applying stain.
Restain
-
Pour stain into the paint pan.
-
Roll the paint roller back and forth in the stain until the nap is filled with stain.
-
Run the roller back and forth across the patched crack to distribute the stain, blending it with existing stain. Depending on the saturation of the original stain, you may need to apply several coats, applying a new coat when the previously applied coat dries.
-
Train a fan set on low to blow directly on the stain. Rinse the paint pan and roller brush.
-
Allow the stain to dry for approximately two days. If you live in a humid climate, it may take up to three days to dry thoroughly.
Tip
An alternative to epoxy sealant is a grout made of Portland cement and water. The crack will need to be moistened before you fill the crack with cement mixture. You will likely be able to easily detect that the concrete was patched. The sealant merely protects your floor and foundation; it is not meant as a cosmetic tool. If the patched crack bothers you, place a rug over it or pull a piece of furniture on top of it, if possible.
The Drip Cap
- Stained concrete adds a certain rustic elegance to a room.
- If it rained recently and the crack is relatively deep, the crack may be damp, so you will need to dry it with a blow dryer on a warm setting.
- Stop when you have traveled about 6 inches along the crack.
- Allow the patched crack to dry for five days before applying stain.
- Pour stain into the paint pan.
- Run the roller back and forth across the patched crack to distribute the stain, blending it with existing stain.
References
Resources
Writer Bio
Kristie Brown is a publisher, writer and editor. She has contributed to magazines, textbooks and online publications. Brown holds a Bachelor of Arts in English from the University of Texas at Austin.
Photo Credits
- Thinkstock/Comstock/Getty Images
- Thinkstock/Comstock/Getty Images
More Articles