Saunas are great for physical and mental health, and they add a bit of Scandinavian chic to your life. If you're a regular at your local gym or health spa's sauna and would like to add this luxurious feature to your home, know that it's possible to build a home sauna either indoors or outdoors.
Types of Saunas
Video of the Day
Depending on your preferences and the amount of room you have inside or outside your home, the following types of saunas are among your options:
Video of the Day
- Wood-burning saunas (Finnish style): These generate smoke and are best suited for outdoor construction away from the main home.
- Electric saunas: These are more suitable for indoor installation, as they imitate a wood-burning sauna without the smoke.
- Steam saunas: Also called Turkish baths, these are usually tiled and generate a lot of steam. Because the steamy air can create mold, these are best installed by a professional.
- Barrel saunas: These cylindrical structures are designed to go outside and are usually manufactured for DIY assembly.
- Shower-sauna combos: These are convenient if you don't have space for a separate sauna room.
- Infrared saunas: Although these aren't saunas in the strictest sense of the word since they heat the body rather than the air, they're a cheaper option that can be installed indoors.
How to Build an At-Home Electric Sauna
The process of building a sauna will differ depending on whether you're building it indoors or outdoors and separate from your main home building. Some saunas come in DIY kits with extensive instructions for installing them. Others are only recommended for professional installation. This guide outlines how to install an electric sauna in a small shed area separate from your house. An existing shed can be converted, or you could build one from scratch.
Step 1: Lay a Concrete Floor
If the space in which you're going to build your sauna doesn't already have a level concrete floor, you'll need to lay one before you begin any other construction. Wooden or tile floors aren't suitable for the foundational floors of saunas.
Step 2: Build a Frame
Build an internal frame that sits within the walls of the shed. Make sure it's securely anchored to the floor and to as many points on the wall as possible.
Step 3: Run the Electrical Wiring
Run the electrical wiring between the inner framing and the shed walls. You'll need to do this before you start working on the visible features of the sauna.
Step 4: Add Insulation
Affix insulation around the walls and the ceiling followed by the radiant barrier, such as reflective silver padding.
Step 5: Waterproof the Floor
Add a vapor barrier to the floor. This will protect the cement from the sauna's inevitable moisture.
Step 6: Add the Internal Paneling to the Walls and Ceiling
Lay the wood paneling over the insulation and radiant barrier on the walls and ceiling. Cedar wood is preferable to pine because it will better hold up against heat and steam, but it is more expensive. Start with the ceiling because it's trickier but can help support the panels on the walls.
Step 7: Finish the Floor
Add a radiant barrier layer to the floor and then cover in more cedar panels.
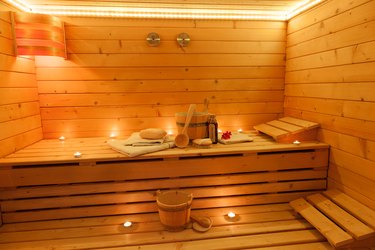
Step 8: Add a Bench
Construct the bench from the same cedar wood. Saunas traditionally have a couple of levels of seating, but what you do will depend on your own preferences and the available space.
Step 9: Install the Heater
Install the heater according to its instructions. Electric sauna heaters heat rocks that then heat the room. You might want to hire an electrician to help with this part.
Step 10: Finish the Entrance Area
If your shed space allows, lay tiles outside the door to the sauna. This will add extra protection against moisture. A cubby hole for towels and belongings and a bench are also useful additions.