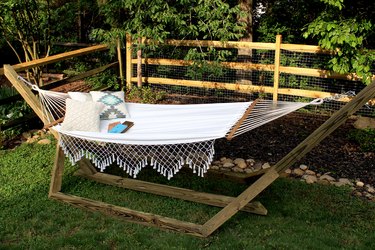
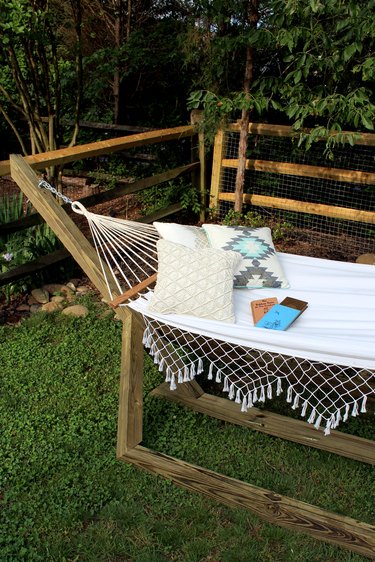
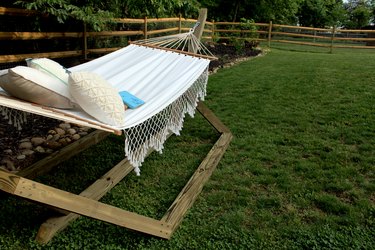
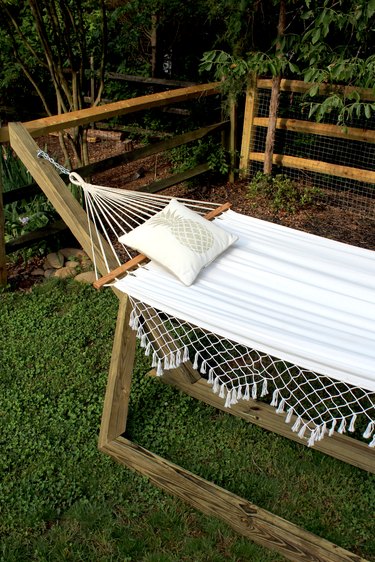
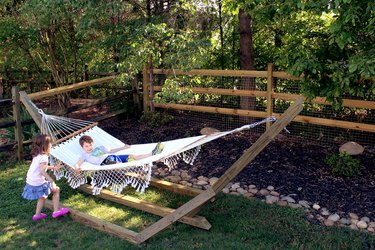
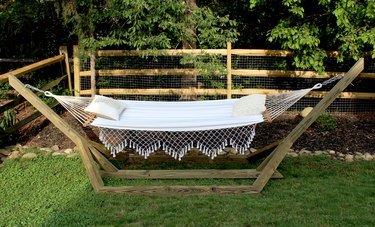
Hammocks make for the ultimate backyard "staycation." Nothing says summer quite like reading a book in a hammock! This free-standing wood hammock stand uses basic, pressure-treated wood posts, deck screws, and 45-degree angles to create a custom-looking stand for about $60 — much less than the average cost of a store-bought hammock base! This project creates a hammock base that's 13-feet long from eye bolt to eye bolt, making it the perfect length for 11-foot-long hammocks.
Video of the Day
Things You Need
- 4 x 4 pressure-treated posts, 6 feet long, ( 6 )
- 4 x 4 pressure-treated post, 8 feet long, ( 1 )
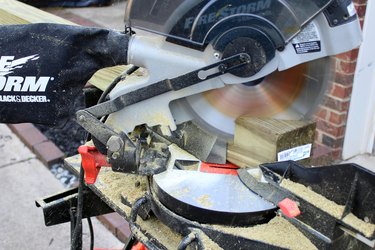
- 12-inch miter saw
- Pencil
- 4-inch corrosion-resistant deck screws
- Drill
- 5/8-inch spade drill bit
- Tape measure
- Mallet
- 1/2-inch -by-6-inch eye bolt with hex nut and 1/2 inch washer, ( 2 )
- Wrench
Video of the Day
TIP: Due to the weight of the wood posts, we recommend this as a two-person project.
Step 1
Cut the two 6-foot posts with miter saw to make four 3-foot posts.
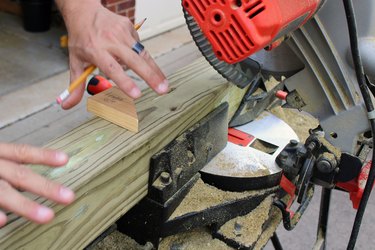
Step 2
Using a scrap piece of wood cut at 45 degrees as a template, draw a 45-degree line on each end of all wood posts.
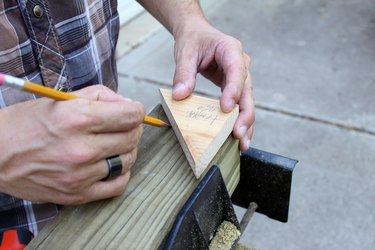
Step 3
Use a miter saw to cut 45-degree angles on each end of the posts, using the pencil marks as guides. The cuts should angle inward toward one another on the same face of the post.
Step 4
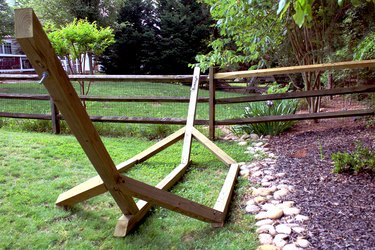
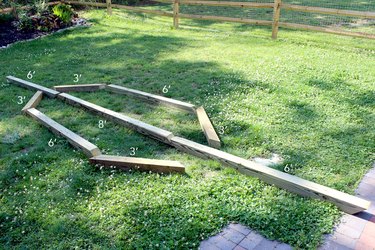
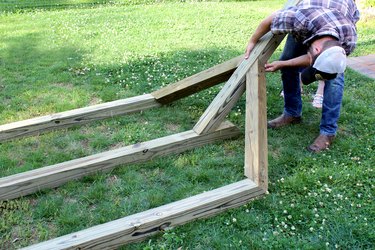
Lay out the overall plan for the hammock in an open space, as shown below. For ease, it's best to build your hammock near the area where you'll use it, as the sturdy frame will be heavy.
Step 5
Raise a 3-foot post at an angle against the mitered end of one of the side 6-foot posts (here's where you need a helper) so that the top mitered edge of the 3-foot post is flush with the top edge of the 6-foot post.

Step 6
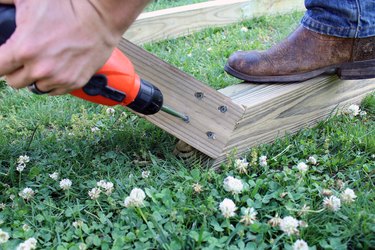
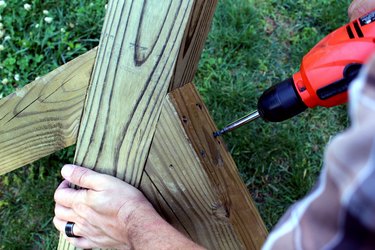
Drive four 4-inch deck screws to join the posts together at the joint. Repeat this for all four corners, joining all four 3-foot posts to the 6-foot posts.
Step 7
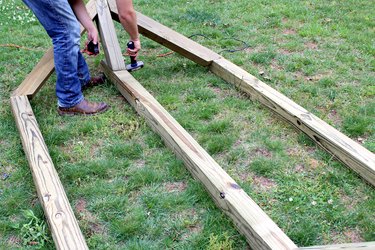
Position one of the end 6-foot posts that was laying between the 3-foot posts (see step 6 for reference), and position it between both angled 3-foot posts, so the edges are flush and the mitered end is resting flush against the horizontal 8-foot-long bottom post.
Step 8
Drive four 4-inch deck screws on both sides to connect the 3-foot pieces to the angled 6-foot piece. Repeat steps 7 and 8 on the opposite side of the hammock stand.
Step 9
Straighten the center 8-foot post with a mallet so the edges are flush with the edges of the angled 6-foot posts.
Step 10
Use a tape measure to ensure that the 8-foot post overhangs the angled 6-foot posts by an equal distance at each end.

Step 11
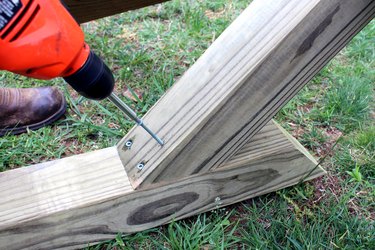
Using 4-inch deck screws, attach the angled 6-foot post to the 8-foot post in four places. Repeat this step at the other end of the 8-foot post.
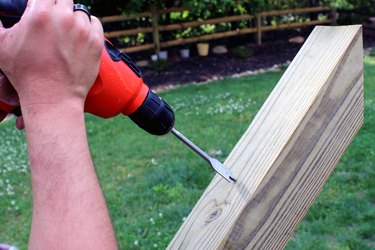
Step 12
Measure up about 48 inches up from the ground, and drill a hole completely through the angled 6-foot post, using a 5/8-inch spade drill bit. Repeat for other angled post.
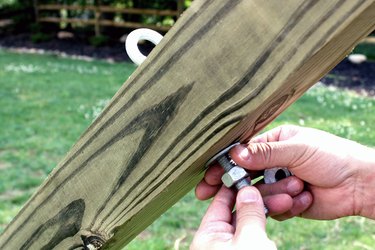
Step 13
Thread a 1/2-inch eye bolt through the hole, and secure it with a washer and hex nut. Repeat for other angled post.
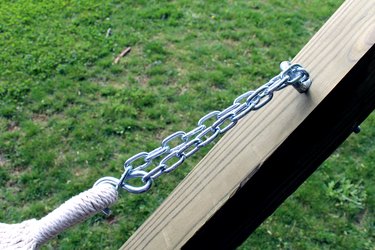
Step 14
Attach your hammock to the eye bolts according to the hammock's instructions.
Your hammock stand is complete! Pat yourself on the back, pour yourself a drink, and enjoy your new hammock! It is our kids' new favorite place to play and relax outdoors. The supplies to make your own are readily available at your local home improvement store, and for only $60, it's budget friendly, too!