
How to Cover Kitchen Cabinets With Vinyl Paper

If your kitchen cabinets are in need of an update, a remodeling option is available to you in the form of vinyl paper. Replacing or even re-facing kitchen cabinets can be cost prohibitive, but vinyl paper offers an easy makeover option without being expensive.

Additionally, vinyl paper provides an easy-to-clean surface in the kitchen. Best of all, installing the vinyl paper is quick and easy, so your kitchen’s new look may only be an afternoon away.
Things You Will Need
- Measuring tape
- Vinyl paper rolls
- Pencil
- Screwdriver
- Scissors
- Squeegee
- Sharp knife (optional)
- Small pin (optional)
Tip
To avoid cutting the vinyl paper too small for the cabinet face, cut a piece that is slightly larger than the measurements and trim off the excess with a sharp knife. If there are remaining air pockets under the vinyl paper, use a small pin to prick the air pocket and release the air. Avoid pricking the vinyl paper too many times because this can create puckering on the surface.
Getting Ready
-
Measure your kitchen cabinets in order to determine how much vinyl paper you will need. Check the size of each roll of vinyl paper because the amount you will need will also depend on the amount that is provided on each roll.
-
Select the pattern of vinyl paper you want to use. Manufacturers are providing an increasing number of options, so whether you prefer a faux wood-grain look or something entirely different, there are plenty of choices to suit the style you want in your kitchen.
-
Wash the cabinet faces with warm water and a mild soap. Let them dry completely before covering them with the vinyl paper.


Covering the Cabinets
-
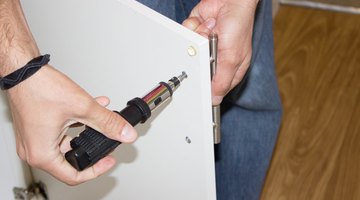
Remove the cabinet handles. Keep all of the hardware together so reinstallation is a simple job.
-
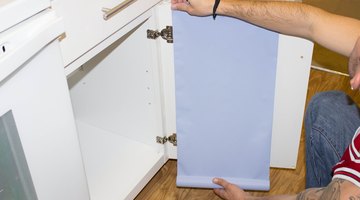
Measure the cabinet face, and cut out the vinyl paper according to that measurement. Hold it up to the cabinet to make sure the measurement is accurate. If your cabinet face is larger than the roll of vinyl paper, you will have to line up two pieces carefully and make sure the seam isn’t obvious.
-
Remove the adhesive backing and apply the vinyl paper to the cabinet face quickly. Smooth out any wrinkles or air pockets with a squeegee by running it along the vinyl paper.
-
Reattach the cabinet handles, being sure to check for where they are located under the paper to avoid making excess holes.


The Drip Cap
- If your kitchen cabinets are in need of an update, a remodeling option is available to you in the form of vinyl paper.
- Replacing or even re-facing kitchen cabinets can be cost prohibitive, but vinyl paper offers an easy makeover option without being expensive.
- Measure the cabinet face, and cut out the vinyl paper according to that measurement.
- Reattach the cabinet handles, being sure to check for where they are located under the paper to avoid making excess holes.
Writer Bio
Kristie Lorette started writing professionally in 1996. She earned her Bachelor of Science degree in marketing and multinational business from Florida State University and a Master of Business Administration from Nova Southeastern University. Her work has appeared online at Bill Savings, Money Smart Life and Mortgage Loan.
Photo Credits
- Nicolas Agustin Cabrera/Demand Media
- Nicolas Agustin Cabrera/Demand Media
- Nicolas Agustin Cabrera/Demand Media
- Nicolas Agustin Cabrera/Demand Media
- Nicolas Agustin Cabrera/Demand Media
- Nicolas Agustin Cabrera/Demand Media
- Nicolas Agustin Cabrera/Demand Media
- Nicolas Agustin Cabrera/Demand Media
- Nicolas Agustin Cabrera/Demand Media
More Articles