
How to Make a Split Log Bench

Benches come in all shapes and size, and some carry a hefty price tag. If you are in the market for a new bench, consider a homemade version using logs. This economical bench project is rustic and comfortable at a price that can't be beat.
Only a few supplies, in addition to logs, are required to construct this unique piece of furniture that looks splendid in any outdoor living space.
Things You Will Need
- Log, about 8 to 12 inches in diameter
- Measuring tape
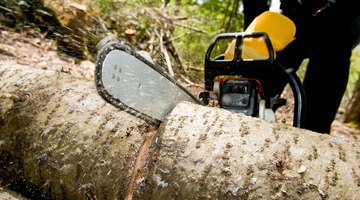
- Chainsaw
- Protective equipment
- Level
- Draw knife
- Medium-grit sandpaper
- Wood stain
- Paintbrush
Tip
Ask an assistant to help you lift heavy loads and hold the logs steady as you cut.
Warning
Wear protective safety gear, and be careful when using a chainsaw.
Legs
-
Use a chainsaw to cut a log to measure 3 feet long. This log will be used to create the legs of the bench.
-
Place the log on one of its ends on a level area. Use a level to check if the top of the log is level. Adjust the height of the log until it is perfectly level.
-
Use the chainsaw to carefully cut the log in half lengthwise. Each half will serve as a leg for the bench.


Seat
-
Cut a second log to measure 6 feet long. This will be the seat of the bench.
-
Cut the seat log carefully in half along the length. Pick the smoother half for the seat, and set the other half aside.
-
Draw a straight line across the smooth side of the seat half four inches from one of its ends. Repeat six inches from the other end.
-
Cut the ends of the log to measure 4 inches thick and 8 inches wide, using the line drawn in Step 3 as your guide. These are the joints of the seat that will attach the seat to the legs.

Finishing
-
Place one of the legs in front of you with the smooth side facing up. Draw a straight line across the center of the flat surface of the log. Use the chainsaw to cut a chunk out of the log along that line measuring 4 inches deep, 4 inches wide and 8 inches long along the line. Repeat this process on the second leg.
-
Remove the bark from the legs and seat of the bench using a draw knife. Sand all rough edges on the pieces down with 120-grit sandpaper. Apply wood stain to the tree pieces using a paintbrush. Allow the stain to dry thoroughly.
-
Select a level location to install your bench. Place the two legs across from each other, with their flat sides facing each other. Adjust them so that they are about six feet apart. Place the seat board in between them with the flat side up. Slide one end of the seat into the groove cut in one of the legs. If it does not properly fit, use sandpaper to smooth out the joint. Repeat on the other side.

The Drip Cap
- Benches come in all shapes and size, and some carry a hefty price tag.
- Use a chainsaw to cut a log to measure 3 feet long.
- This log will be used to create the legs of the bench.
- Use a level to check if the top of the log is level.
- Repeat six inches from the other end.
- Place the seat board in between them with the flat side up.
References
Writer Bio
Susan Patterson is a health and gardening advocate. She is a Master Gardener, Certified Metabolic Typing Advisor and a Certified Health Coach with vast experience working with organic gardening and nutrition. Her passions include sustainable living, organic foods and functional fitness. Patterson has been writing and presenting on health and gardening topics for 10 years.
Photo Credits
- Jupiterimages/Photos.com/Getty Images
- Jupiterimages/Photos.com/Getty Images
- Hemera Technologies/PhotoObjects.net/Getty Images
- Ablestock.com/AbleStock.com/Getty Images
- Jupiterimages/Photos.com/Getty Images
- Thinkstock/Comstock/Getty Images
More Articles