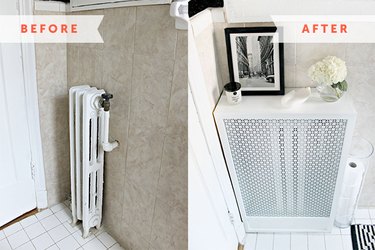
One common complaint that we constantly hear from renters is the lack of counter space, especially in bathrooms. If your small bathroom in need of another flat surface, this DIY radiator cover is the project or you.

Video of the Day
Before You Begin: Take Measurements
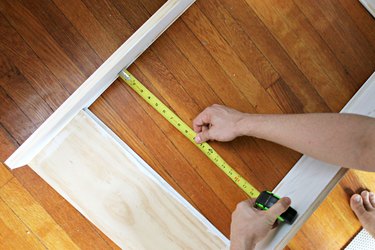
Before you gather your supplies for this project, the first thing you need to do is measure your radiator. If you want the cover to extend along the wall, wider than the radiator itself, use those measurements. The most important measurements that you need to take are the depth (from the front of the radiator back to the wall) and the height (from the floor to the top of the radiator).
Video of the Day
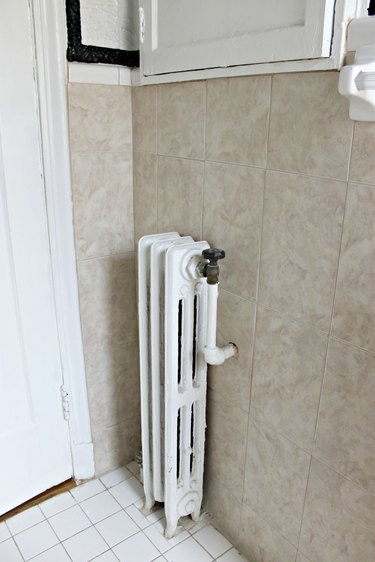
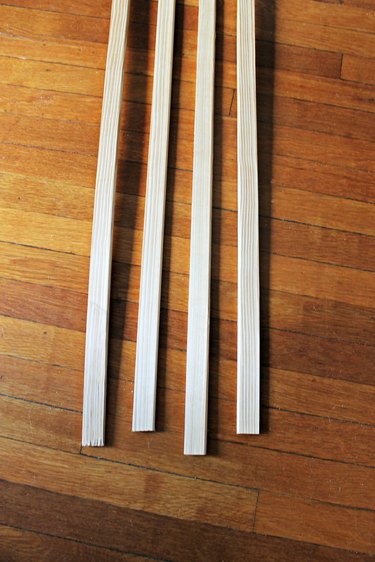
In this example, the measurements were 22 inches wide by 38 inches tall, with a depth of 8 inches. For this project, you will need four pieces of wood: two cut to the size of your height, and two cut to the size of your width.
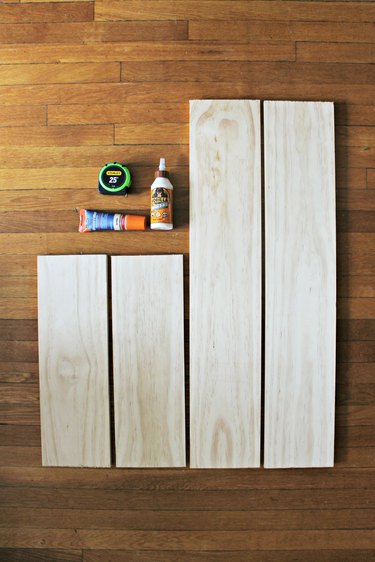
Things You'll Need
Measuring tape
Pine boards, cut to size
Hammer
Paint and primer
How to Build a Radiator Cover
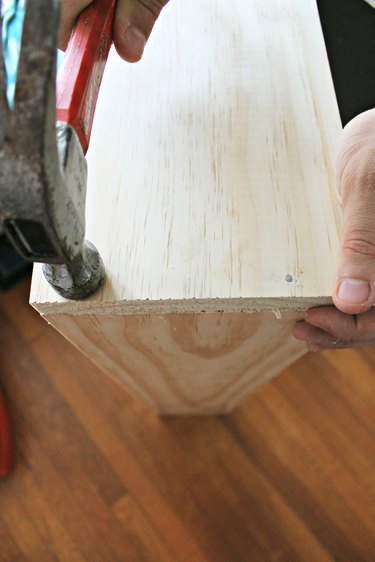
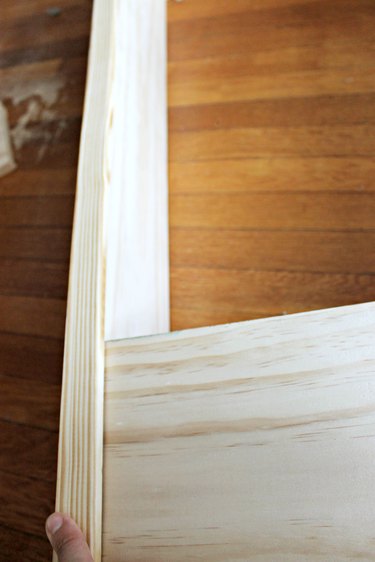
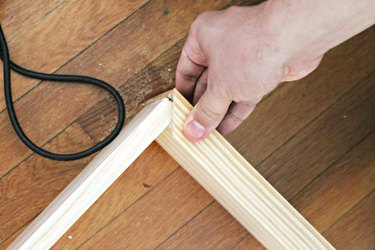
1. Nail the Top Board to the Side Boards
Begin assembling the general shape of the radiator cover. Take one of the smaller boards and nail it to the top of the two longer boards to form the top and sides of the cover.
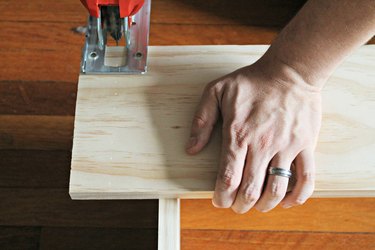
2. Cut the Base Board
Lay the cover on its side, and measure the inside of the "bottom." Cut the last board to fit inside the two sides, like this:
Tip
Use a bit of Liquid Nails to secure the base board before you nail it in place.
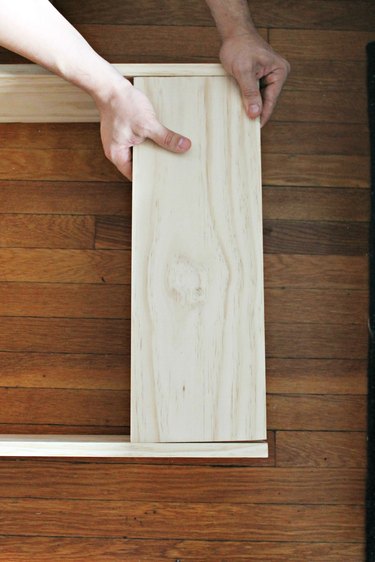
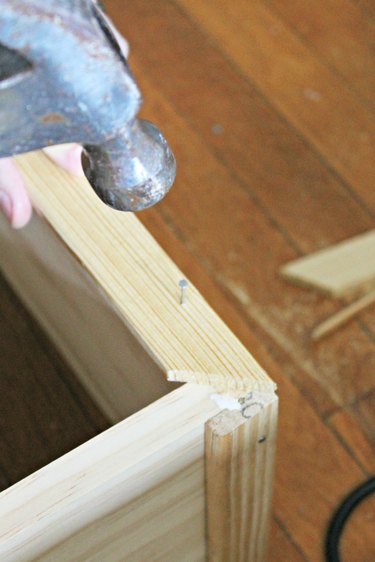
3. Nail the Base Board in Place
Make sure the base board is flush with what will be the front of the radiator cover. This base board provides stability to the cover, and gives you a clean and finished look.

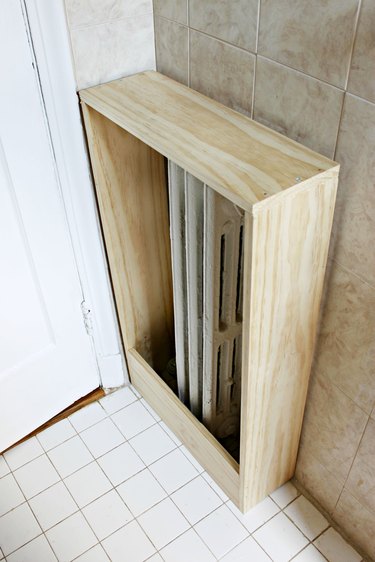
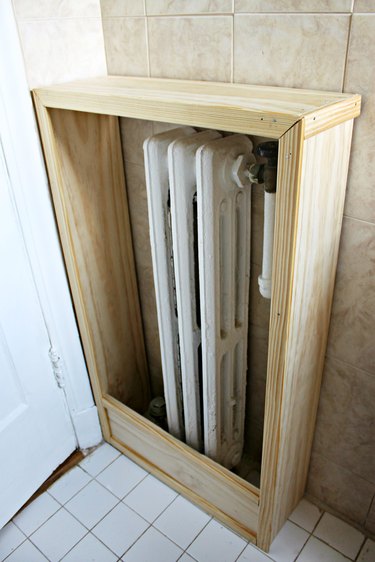
You should now have the rough idea of what the cover will look like. Place the cover over the radiator to make sure that it covers everything, and that you like the look.
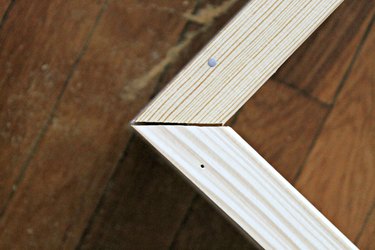
4. Add Trim to the Cover
For the trim in this example, we used pine lattice board in a 1.5 inch width. This wood is easy to paint and cut, and is light enough so that it won't make the radiator cover top heavy. The trim not only serves as a decorative touch to this radiator cover, but it also gives you something to adhere the radiator tin to, which we will get to later on.
Measure the front dimensions of the cover, and cut the corners where the trim meets at a 45 degree angle (much like you would do with molding).
Tip
Use Liquid Nails to hold the trim in place before you nail it to the cover.
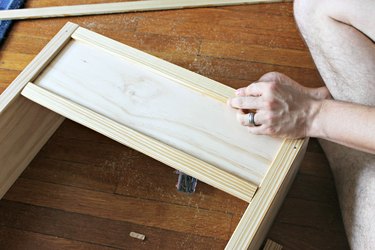
5. Nail the Trim to the Front of the Cover
Use small wood nails to nail the trim to the front of the cover. You want to make sure that the trim creates a little bit of a lip — this ensures that the radiator will be held in place in the future.
Don't worry about the corners completely touching — these can be filled in with wood glue.
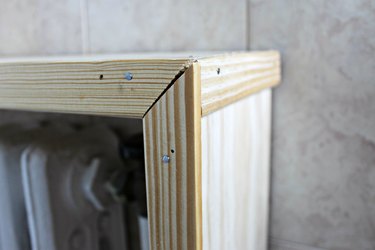
For the base board, measure and cut the trim to fit inside the trim that runs along the front of the radiator cover, like the photo above. These pieces should fit flush with the edges, creating a nice rectangular inset.
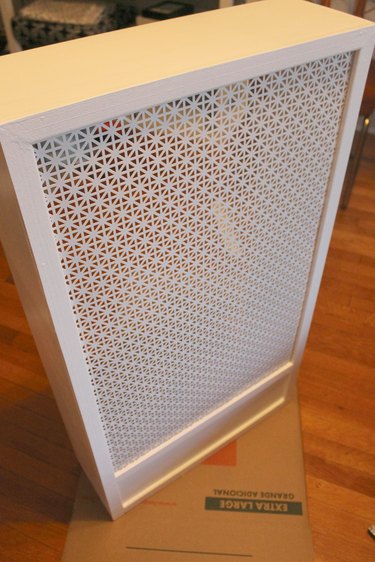
This is what the radiator cover will look like once you've nailed your trim to the front. You can also choose to run some trim along the side of the radiator cover, like I chose to do here. This gives it a more custom look, and really finishes off the piece.
6. Prime the Cover
Prime the wood radiator cover frame with high-quality primer. While the primer is drying, prepare your radiator tin to be cut. Wipe with a clean, damp cloth to remove any dirt and dust and follow the next step to measure and cut the tin to size.
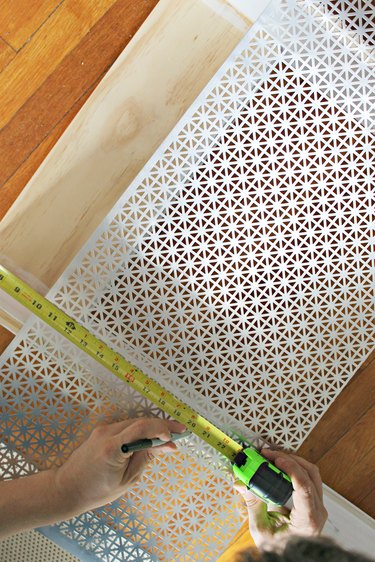
7. Measure and Cut Radiator Tin
Once the primer is dry, flip the radiator cover on its face and measure the width of the inside.
Mark the dimensions with a marker on the radiator tin, and cut very carefully with tin snips.
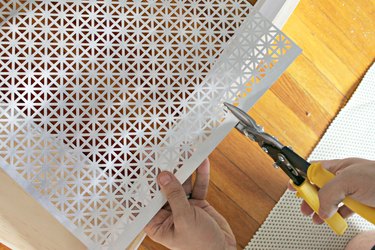
Warning
Tin snips and cut tin will be very sharp! Be careful around rough edges.
8. Pop Tin Back Inside the Radiator Cover
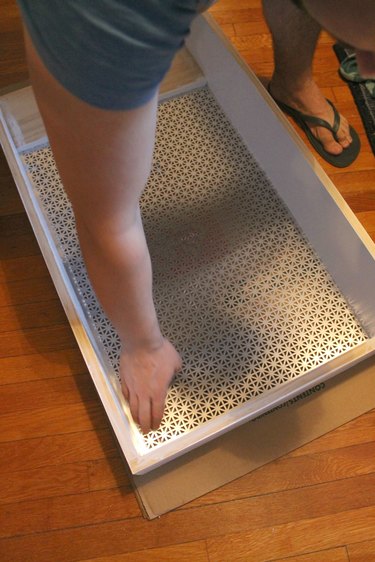
Place the piece of cut radiator tin into the radiator cover to make sure that it fits. It should be tight enough that there are no visible gaps from the front, but not too tight that the metal bows in the middle.

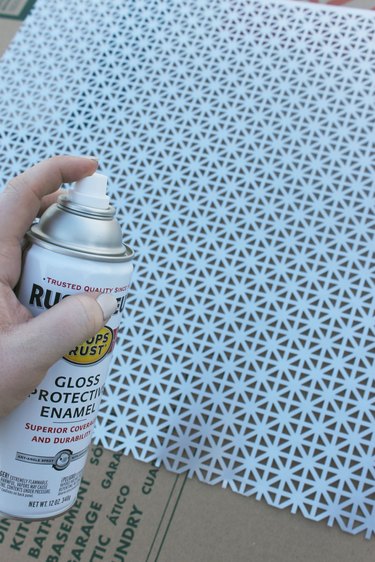
9. Remove Tin and Spray Paint
Once you're sure that the radiator tin is cut to the correct size, spray paint the metal. Holding the can about 12 inches away from the tin, spray back and forth in light spritzes. This ensures that the paint goes on evenly and does not drip.

10. Paint Radiator Cover
While the radiator tin is drying, paint the cover with the paint color of your choice. Use this time to fill any holes or gaps with wood glue, as well.
11. Push Tin Back Into Place
When the spray paint dries, pop the tin back into the radiator cover, pushing slowly to make sure you don't scratch the paint.
Tip
Dab a few dots of Liquid Nails in the corners to hold the tin down. Make sure to wipe off the front of the tin if there is any seepage.
12. Staple the Tin in Place
Use a staple gun to staple the tin in place. If you've cut the tin to the correct size, it shouldn't need that many staples. Two to three per side should work just fine.

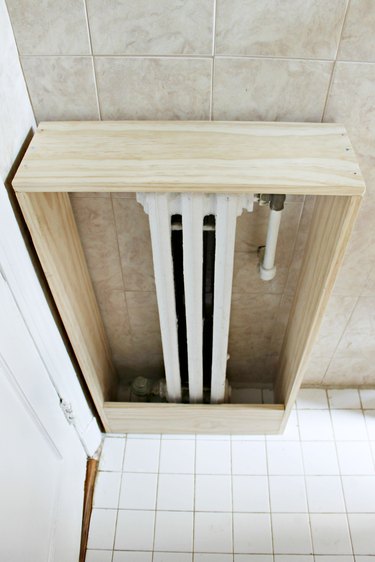
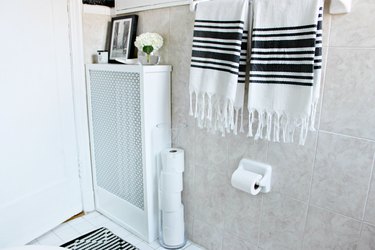
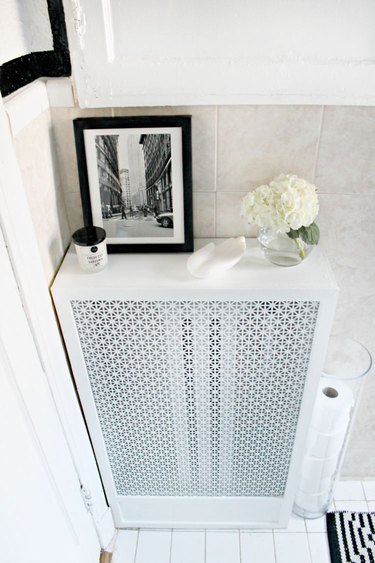
13. Enjoy Your Radiator Cover and New Counter Space
The new radiator cover covers the unsightly radiator, but also give us an additional flat surface for storage (or fresh flowers!) The cover itself is light and easy to remove!

And there you have it! An easy radiator cover that combines form and function.